Azure
Integrate Azure on Embold On-premise
To enable authentication using Azure and start scanning your first Azure repository, the first step is to configure and authorize Azure Oauth App on Embold on-premises.
Steps to configure and authorize Azure Oauth App on Embold on-premises are:
- Create Azure Oauth App. Follow the instructions below on creating Azure Oauth App.
- Once you login on Embold on-premise, you will be navigated on Manage organizations page. (If not, find Manage organizations link under organization dropdown visible on top-left corner besides Embold logo).
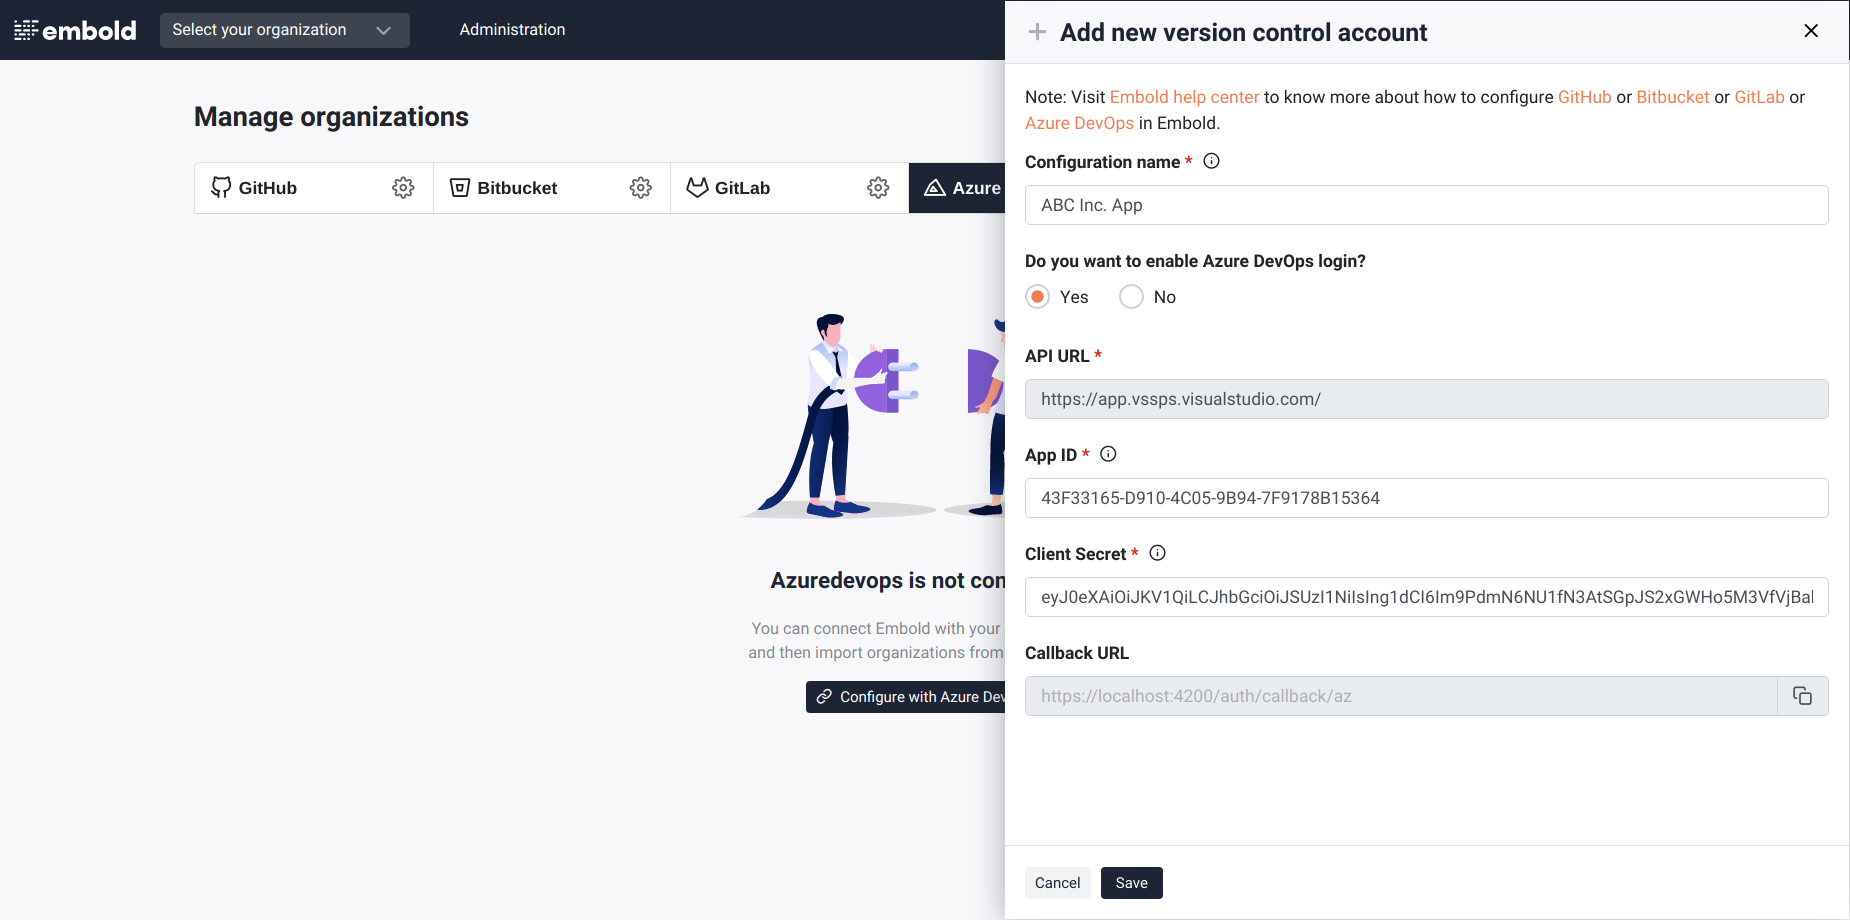
- Under Azure tab, click on Configure with Azure button. This will open a right panel (as shown in below screenshot) with Add version control account form.
- Fill the form with required details (as shown in screenshot)
- Configuration name: This can be of your choice
- Enable Azure login: Choose “Yes”
- App ID: Copy this from your Azure Oauth App on dev.azure.com
- Client Secret: Copy this from your Azure Oauth App on dev.azure.com
- Callback URL: Paste this URL on your Azure Oauth App on dev.azure.com.
- Click on Save button and you’re done.
- Now under Azure tab, you will see Authorize with Azure button.
- There are 2 ways to authorize with Azure on Embold on-premises – either you can proceed to click on Authorize with Azure button directly and complete the Authorization flow or logout and choose Login with Azure option.
- This is how one can configure and authorize Azure to start using Azure on Embold on-premise.

Steps to create an Azure Oauth App on Dev.Azure.com are:
- Login on Dev.Azure.com using your own account.
- Click on profile icon visible on top-right corner and go to Applications page as shown in below screenshot
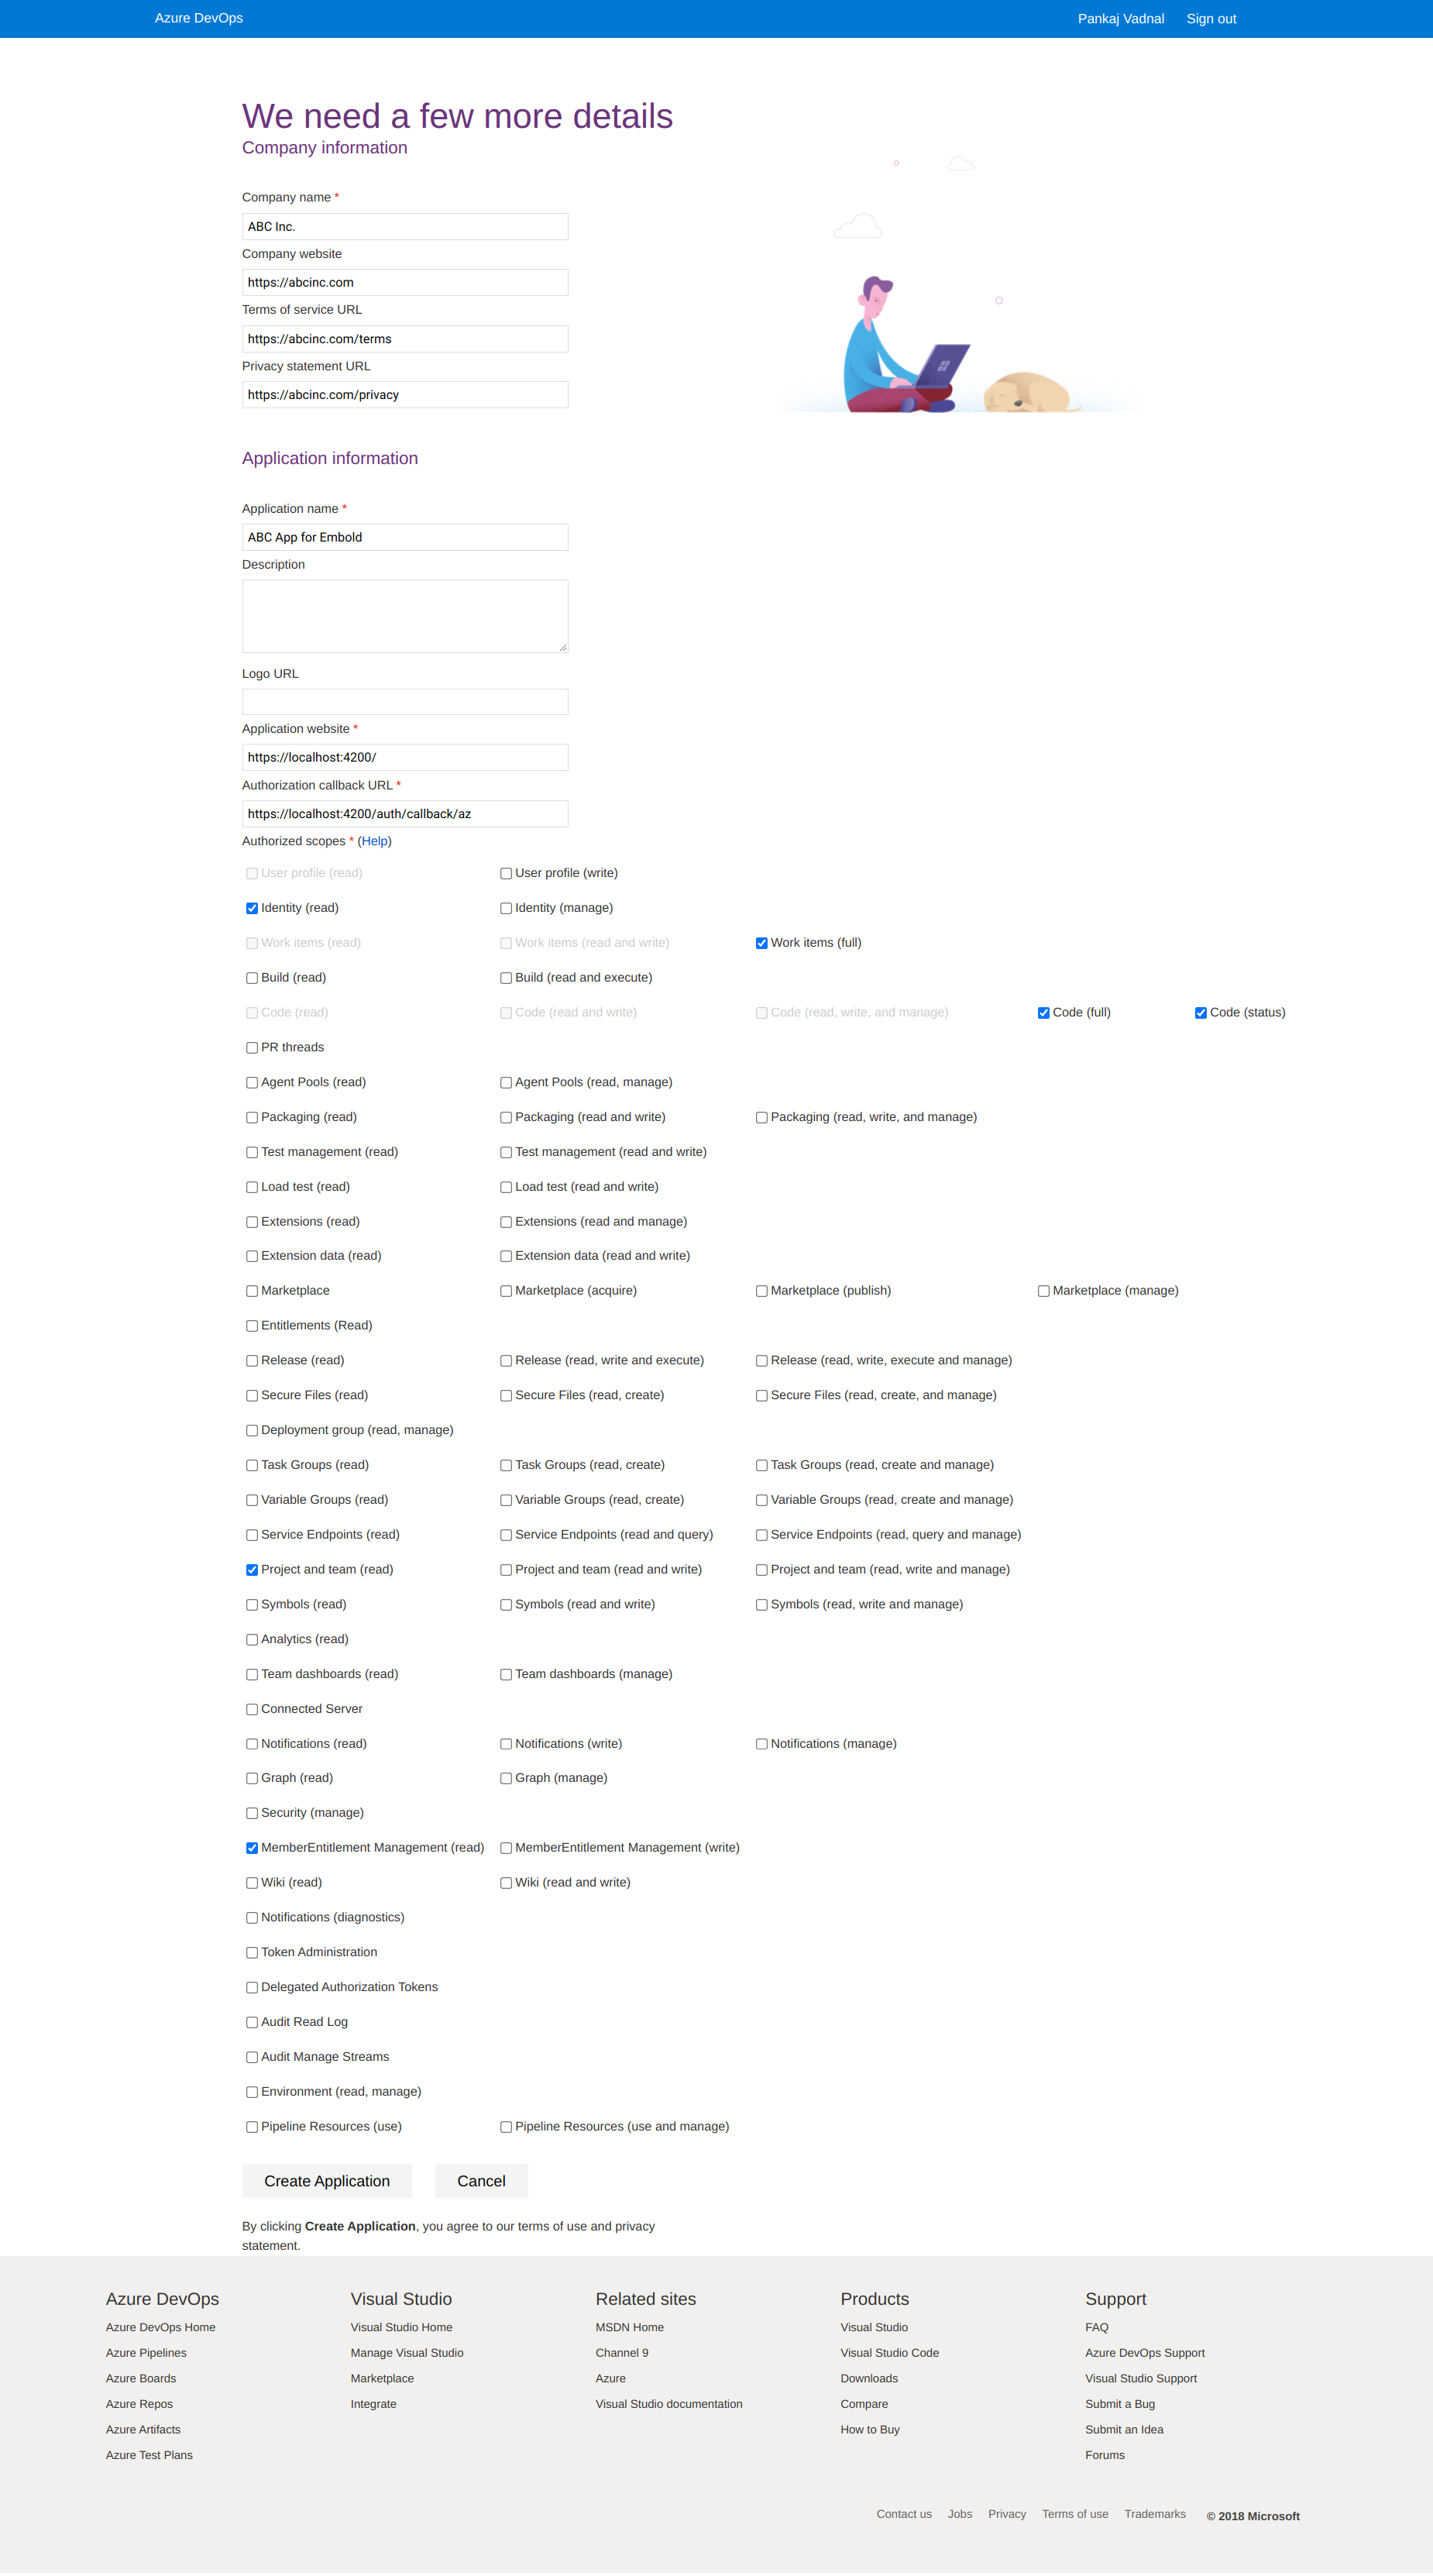
- Register the application with all the required fields. Make sure you copy Callback URL from Embold on-premises (as shown in above screenshot) and paste inside Redirect URL text area on dev.azure.com. Application website & Authorization callback URL must be secure https URL for e.g., https://localhost:4200/ https://localhost:4200/auth/callback/az.
- Select the required scopes (as shown in the below screenshot-A) and Save application
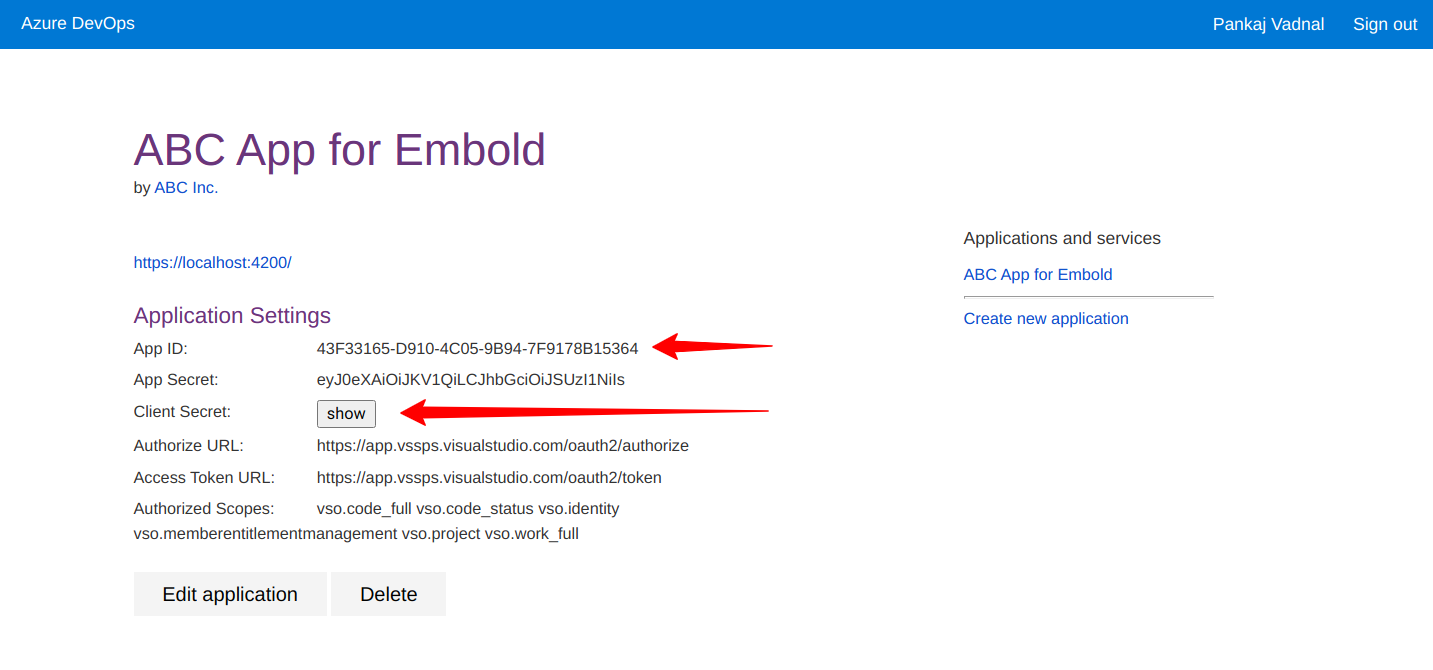
- Once the Oauth App is saved you will find App ID and Client Secret (as shown in the below screenshot- B)
- Use these App ID and Client Secret while configuring Azure Oauth App on Embold on-premises.
Note:Make sure that, for any organization in Azure, navigate organization settings-> security ->policies-. “Third party application access via Oauth'” should be enabled as shown in the screenshot below.
Once it is enabled, user can see the data (repositories) on Embold.
Screenshot A: Create an Azure App

Screenshot B; View application ID and Client Secret

Updated 8 months ago
